

This article explains how to set up and use the Flexwork function in ELAM Solutions. A Parallel Process step allows a flowchart to be split into multiple independent branches (up to 10). The operator can freely switch between branches and work through them in any order. This is useful when independent tasks need to be completed as part of a single product, without requiring a fixed sequence.
Flexwork is a structural element in ELAM flowcharts that splits a process into up to 10 parallel branches. Each branch contains its own set of steps (e.g., tightening, scanning, manual confirmation). The branches are not executed simultaneously – instead, the operator actively switches between them and works through one branch at a time. The main process only continues once all branches have been completed.
Important: Parallel Process branches do not run at the same time. The operator works on one branch at a time and can switch to another branch at any point using the branch switching dialog in the ELAM Assistant.

Tip: The Parallel Process step is located under the STRUCTURE category in the left toolbox, alongside Section and Station Change.
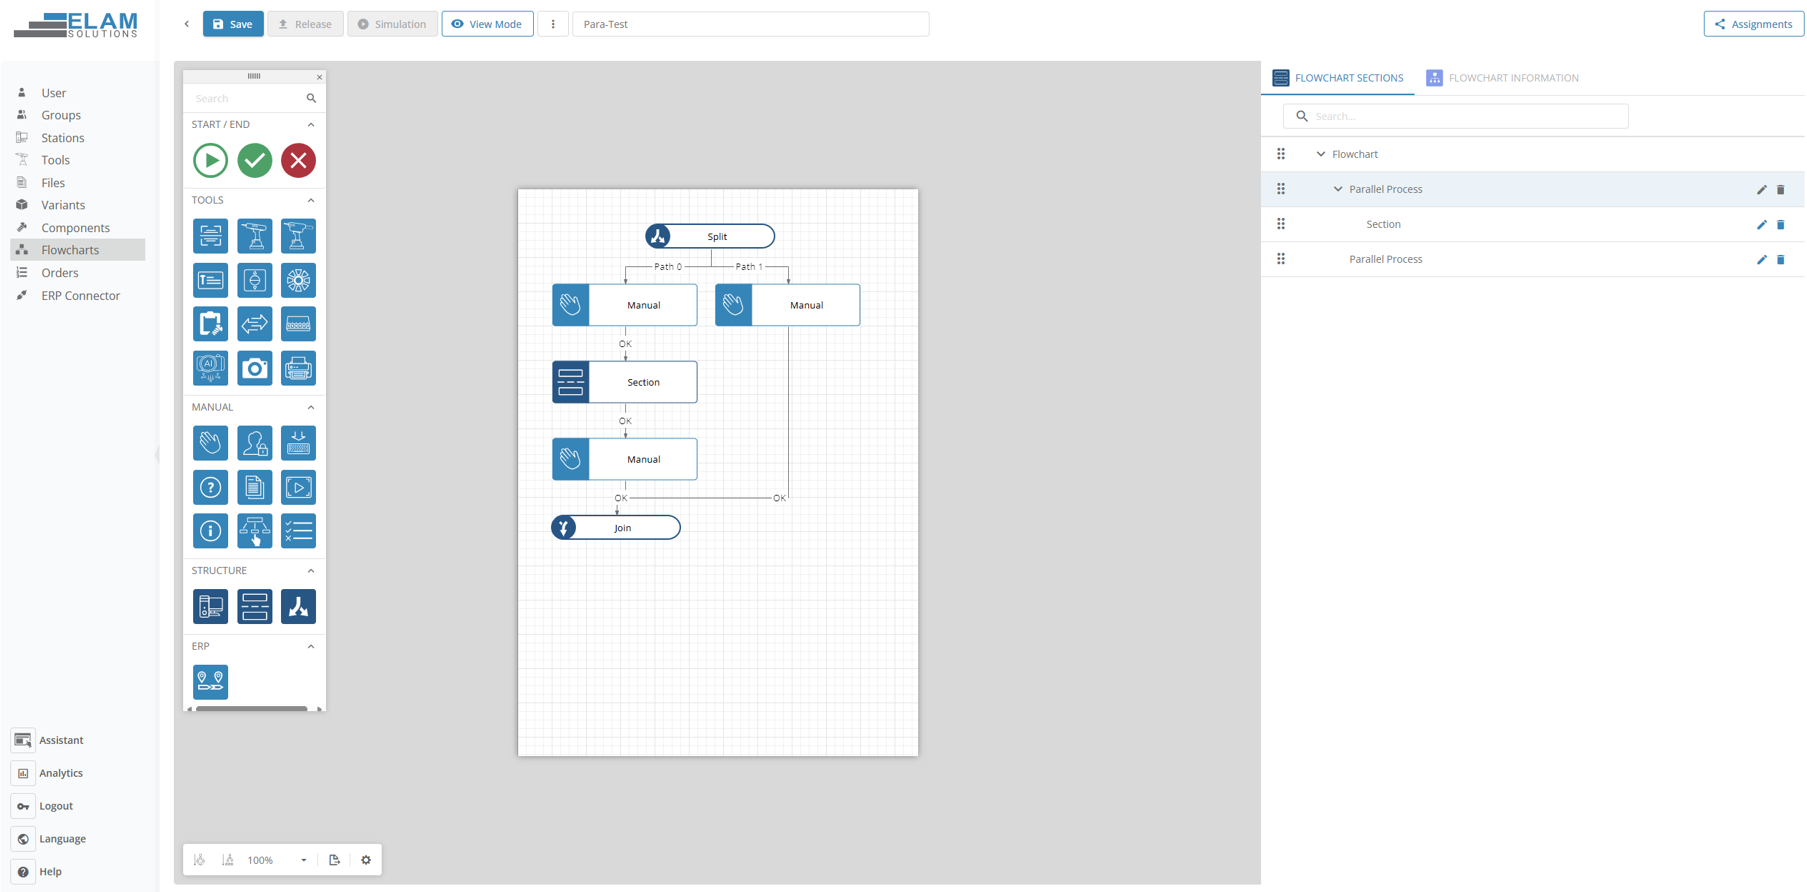
Once a Parallel Process step is placed in the flowchart, it creates a structure with multiple parallel lanes. Each lane represents an independent branch of the process.
Note: Steps within different branches are completely independent. They do not share data or depend on each other’s completion order. The Parallel Process only completes when all branches have reached their end point.
TIPP: By default, you cannot have more than one output on the steps on the Parallel Process. If you want to do steps with multi-outputs on a step, you can drag a section in the prarallel Process.
When an operator starts a variant that contains a Parallel Process step, the ELAM Assistant displays the first branch automatically. The operator works through the steps of the current branch and can switch to a different branch at any time using the Parallel Process icon in the right sidebar of the assistant. This icon shows a fork symbol with splitting arrows – the same icon used in the Administration toolbox.

The operator can switch between branches as often as needed and work through them in any order. Each branch tracks its own progress independently. The Parallel Process completes and the main flowchart advances only when all branches have been fully confirmed.
Recommendation: Use Parallel Process when you have independent assembly or verification tasks that do not depend on each other and where the operator should be free to choose the order of execution.
A single Parallel Process step supports up to 10 parallel branches.
No. The branches are not executed at the same time. The operator works on one branch at a time and switches between branches manually via the Parallel Process icon in the assistant sidebar.
No, this function allows to jump between branches, it does not allow multiple worker to work in the same flowchart.
Sections are sequential groups of steps that organize a flowchart into logical blocks. Parallel Process splits the flow into multiple branches that the operator can work through in any order. While a Section always runs as one block before the next begins, Parallel Process branches can be completed in any sequence chosen by the operator.
No. Parallel Process steps cannot be nested. However, you can place Sections or other structural elements within a Parallel Process branch.
If a step in one branch is confirmed as NOK (Not OK), the behavior depends on your flowchart configuration. The other branches can still be completed unless the flowchart is configured to stop on error.
Yes. Each branch of a Parallel Process can be assigned to a different station. This enables the work to be distributed across multiple workstations on the shop floor.
By clicking the Parallel Process icon (fork symbol with splitting arrows) in the right sidebar, a dialog called “Alternative Pfade” opens showing all available branches. The operator selects the desired branch to switch to it.

